
Workshop – Building an Open Staircase
My original plan was to flip the existing stairs leading upstairs around. So instead of leading to the back door in the kitchen, they would come to the door in the living room. That would make the basement stairs end up at the backdoor/kitchen. But after my ex-landlord showed me some old blueprints of the house which originally planned an open staircase in the living room, I just had to try and see if I could do that.
According to the books I’ve read, building stairs is supposed to be the hardest thing a person can possibly take on. I bought a book called Basic Stairbuilding and it says that if you don’t have any (or very little) carpentry experience that you should never try building stairs on your own. But I’m thick-headed and I’m going to do it anyway. These pictures will detail my progress.
 |
 |
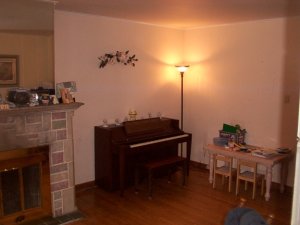
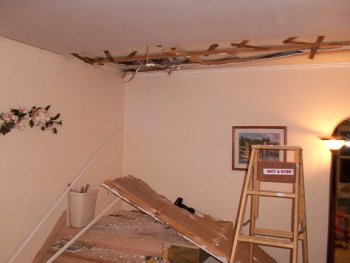
| 6/29/2001 – This is taken before I did anything. The stairs will go in this corner with a landing in the middle. | 7/1/2001 – Step one – building the landing. Of course I put the landing up BEFORE I have anything supporting it underneath. I can never do anything in the right order. |
 |
 |
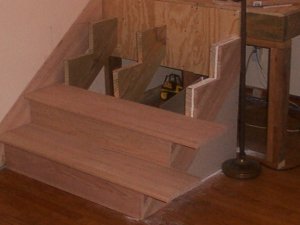
| 7/9/2001 – I’ve gotten the carridges cut and I’m starting to get the oak pieces cut. I managed to accidentally make the bottom rise 3/4″ too small and the top rise 3/4″ too big in 2 completely unrelated math accidents. Math was never my strong point. But I doubt anyone will ever notice 3/4″ when they walk up. | 7/9/2001 – Stairs are cut to size now and I’ve added the bottom rail pole thingie. |
 |
 |
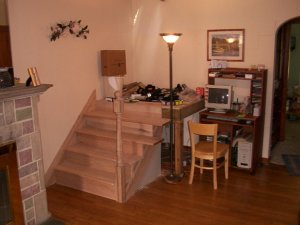
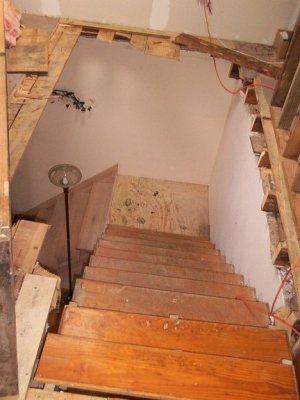
| 10/23/2001 – The carridges sitting up against the wall are the stairs that will go from the landing to the upstairs. I cut those myself! In this picture you’ll see I’ve got the ceiling knocked out. I’m hoping to start cutting into the floor next weekend. | 10/23/2001 – This is where the top of the steps will end up, right where the top of the steps come from the other side. Those existing stairs will be taken out, of course. |
 |
 |
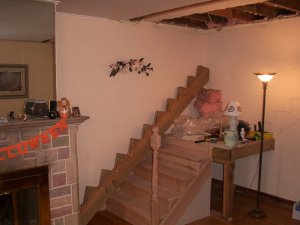
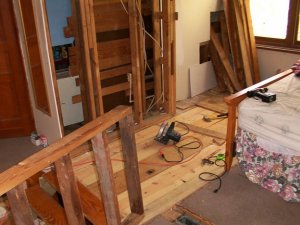
| 10/27/2001 – Starting to tear down the ceiling. | 10/30/2001 – Here’s a shot of the stairs from the top. The top 2 treads aren’t there yet, just have pieces of wood sitting on them. This image is squished, you can click on it to view it correctly. |
 |
 |
| 10/31/2001 – The steps are now in use. The old steps have been mostly removed and I used the treads from the old steps as temporary treads here until I can buy new ones. | 10/31/2001 – This was the opening in the floor where the old stairs came up. I’m covering that up so we can walk on it. |
 |
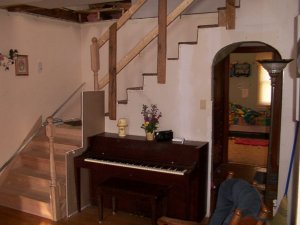 |
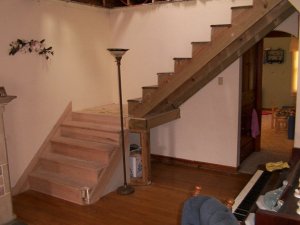
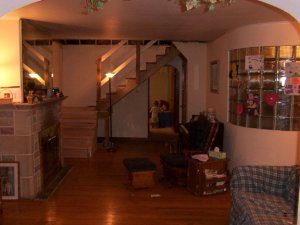
| 11/08/2001 – Nothing much has changed, just added a temporary railing and railings around the opening upstairs to keep the kids from jumping off. | 1/7/2002 – Got the arched doorway done, lots done in the hallway, converted the space underneath the steps into a playroom for the kids, getting the ceiling around the opening for the stairs covered up finally. |
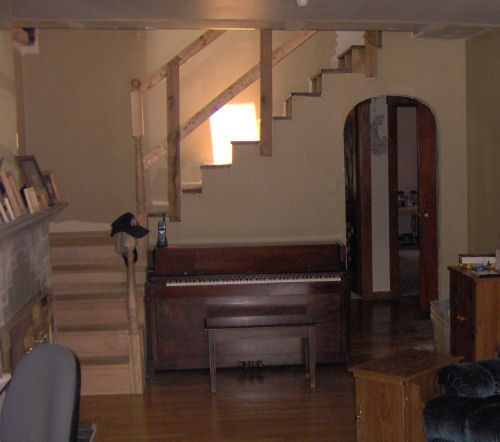
A couple years after this began, I moved from this house and I never completely finished up the staircase. I’m sure the new owners have finished it by now, but I’m unlikely to ever see the finished result. I really enjoyed the project and wish I’d gotten a little further on it, just to see how they turned out. I’ll end this page with my most recent picture (September 2005) of the stairs.
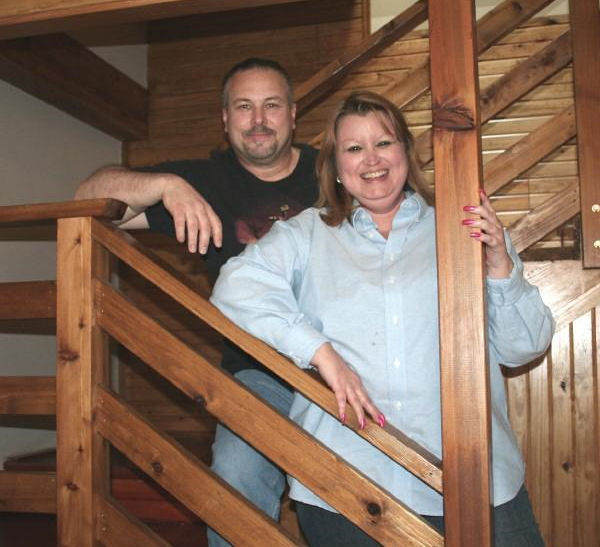
UPDATE: Here’s a picture of the finished stairs, taken in 2008 or 2009, which I found on the current occupant’s Myspace page.
Nice job. You gave me the idea of a house with lots and lots of staircases, many up-and-down options, for fun. Thanks for sharing it.
Pingback: Brad Carter’s Homepage » My stairs are finally completed!
Hi Folks,
My compliments on a creative and functional design that makes excellent use of the available space. Good luck on your next project…since I am sure you will not stop improving your home.
Chip